
Hello and Welcome!
|

|
|
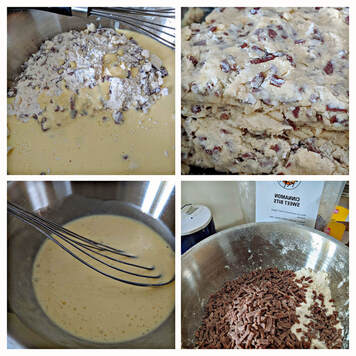
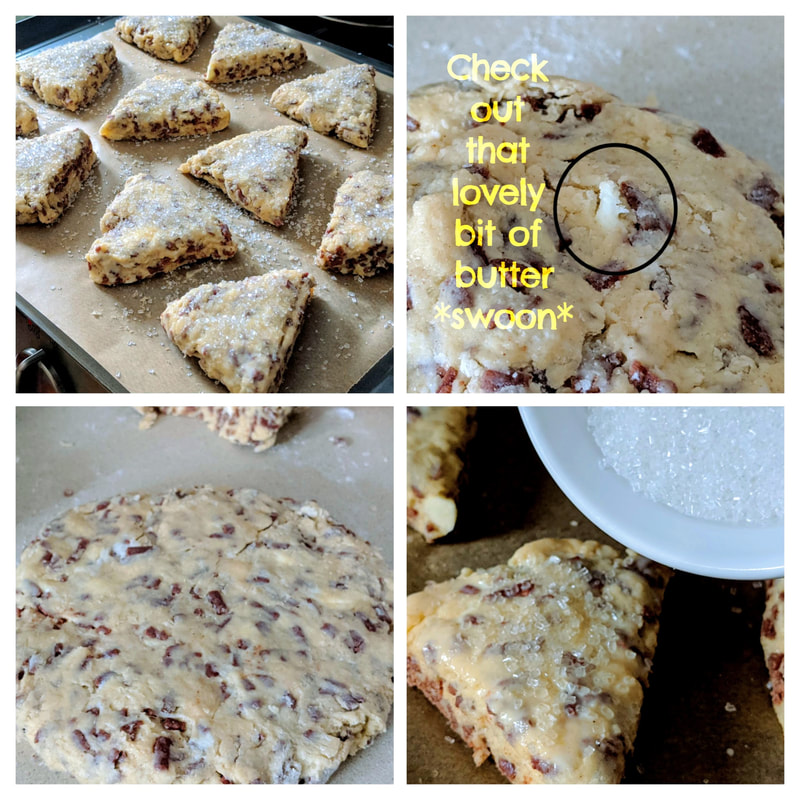
It happens every year. Every. Single. Year. I buy the quart of delicious eggnog and swear I will savor it as a treat. One glass, occasionally, throughout the holiday season. Yet, after I savor that first glass or maybe two, it sits in my refrigerator, waiting to be enjoyed by me. Or someone. Anyone. And it sits there. And sits. Until I’m in mid-January, with all of my goals of eating better, getting more active and wasting less. It just stares at me. Challenging me. Asking, whatchya gonna do? Are you gonna throw me out? What about all that food waste you swore you’d put an end to, huh? Well, a few years ago, I started a tradition where I would use up all of that extra eggnog by finding creative ways to bake or cook with it. Last year, was eggnog French toast and I have also substituted it for the milk when making pancakes and waffles. Boy, is that good, let me tell ya. If you have not replaced milk for eggnog in these breakfast treats, you are missing out for sure. Try it. I’m tellin’ ya. This year, I poked around my favorite website for baked goods, King Arthur Flour. I never fail to find great recipes to try and, sure enough, they came through with some eggnog based recipes. It was a snowy cold weekend here in New Jersey, coupled with a long weekend, so it was a perfect weekend to stay in and bake. I made two recipes from their website. Because that’s how I roll. Never happy sitting still. Both were wonderful. The first was Cinnamon-Eggnog Scones. These are as delicious as they sound. Success with this recipe centers all around technique. To get the "crispy on the outside, tender on the inside" consistency of a well made scone, it all comes down to not overworking the dough. First, you get all of your ingredients in place, then cut your cold butter into uniform, small blocks. This will help you distribute that butter goodness throughout your flour mixture without risking handling it too much. I do this by slicing the stick of butter into thirds and then giving it a quarter turn over and slicing in half. 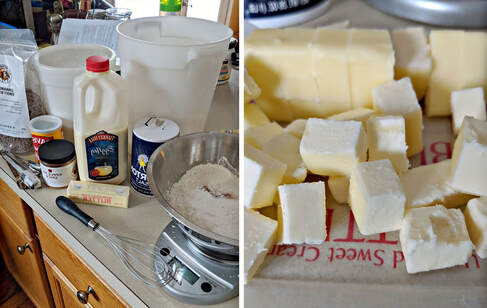 While you can CAREFULLY use a food processor to make your scone dough, I personally love and prefer doing it by hand. I don’t have to worry about heat from the motor softening my butter and I can get beautiful flakes of butter which will ultimately help with the tenderness of the scone. I achieve this by tossing the cut pieces of butter into the dry ingredients and then rubbing the butter with my fingers – the motion is similar to snapping your fingers slowly and using all of your fingers in the snapping motion. This will yield beautiful tiny flakes of butter/flour as opposed to the “pea sized” chunks you are typically told to look for. Check it out: 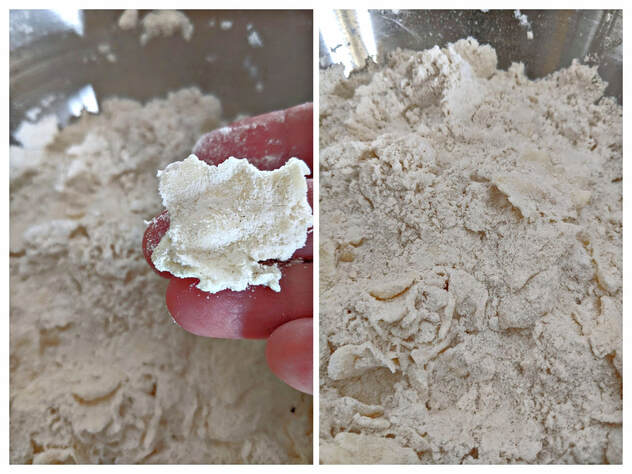 Next, you mix in the wet ingredients and, here is where it gets important. DO NOT OVERWORK MIXING THE DOUGH. You want to be super careful to not melt or soften those gorgeous flakes of butter you created. Ideally, you are going to want to see chunks of butter in your finished dough. Carefully fold the wet ingredients into the dry until the wet ingredients are incorporated. Then, you basically just want to make sure you have no dry patches. You can incorporate the dry mixture further by gently kneading the dough - scooping from the bottom and using the palm of your hand to gently push down. Slightly turn the dough, each time you do this. Again, this is a gentle knead and you just want to make sure all dry ingredients are incorporated. Overmixing is going to give you a tough, hockey puck-like scone. No good.
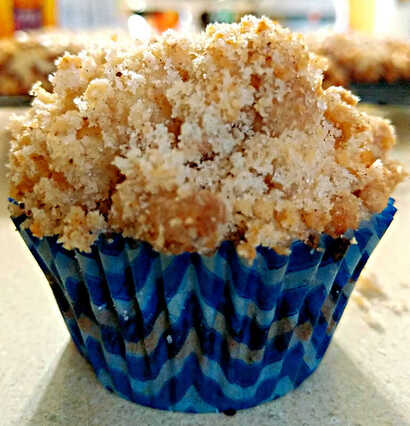
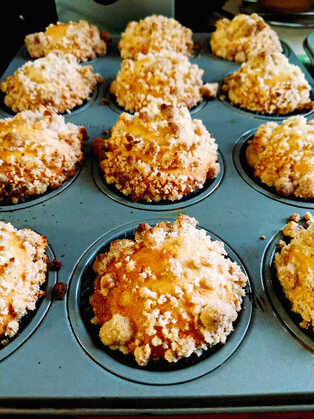
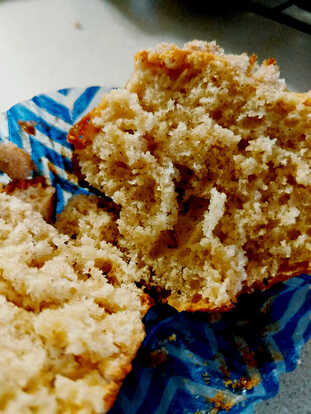
Once your dough is together, you can pat it into a disc and cut out triangles or you can use a floured biscuit cutter to cut out rounds. Also, at the suggestion of the recipe, I put the cut scones in the freezer for 30 minutes before I baked them. This helps the butter get good and cold and will make a huge difference in your finished scone. This recipe yielded an astounding scone. I used the King Arthur Cinnamon Sweet Bits and LorAnn Eggnog Flavor Oil, though neither was necessary and you could easily substitute chips, dried fruit or vanilla, if that’s your jam. Once baked, not only did my kitchen smell AAAAHHHHHHMAZING, but they were the perfect consistency for a scone - a light, crunchy exterior yielding to a soft, pillowy and ethereally tender inside. Look! 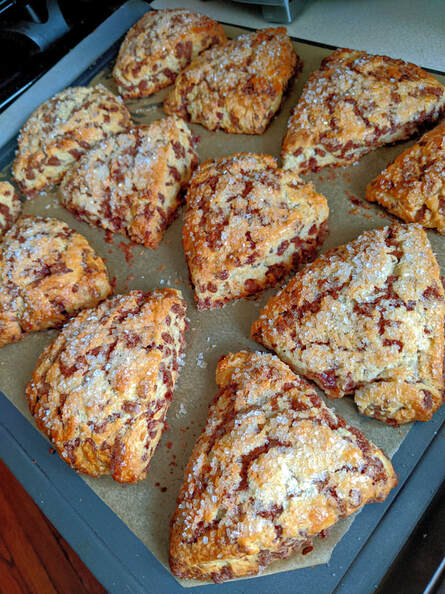 Look! 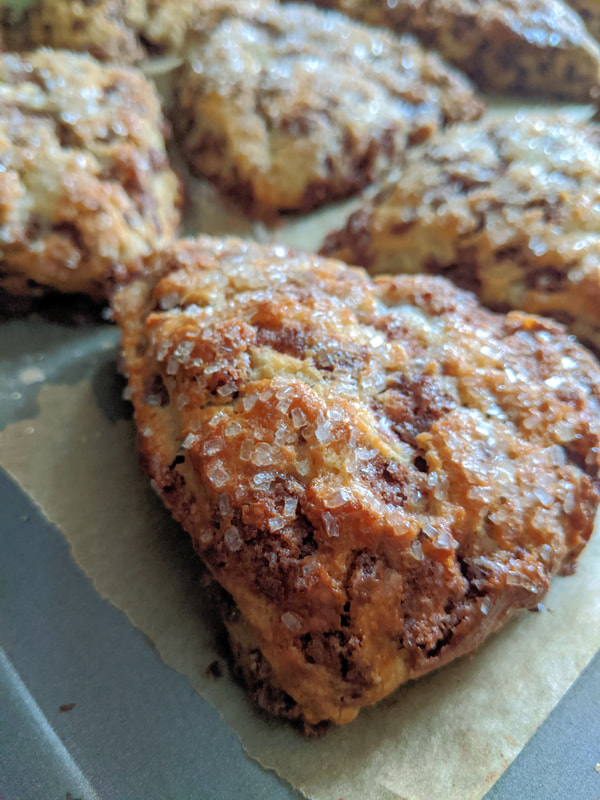 I mean, honestly, what’s not to love here? 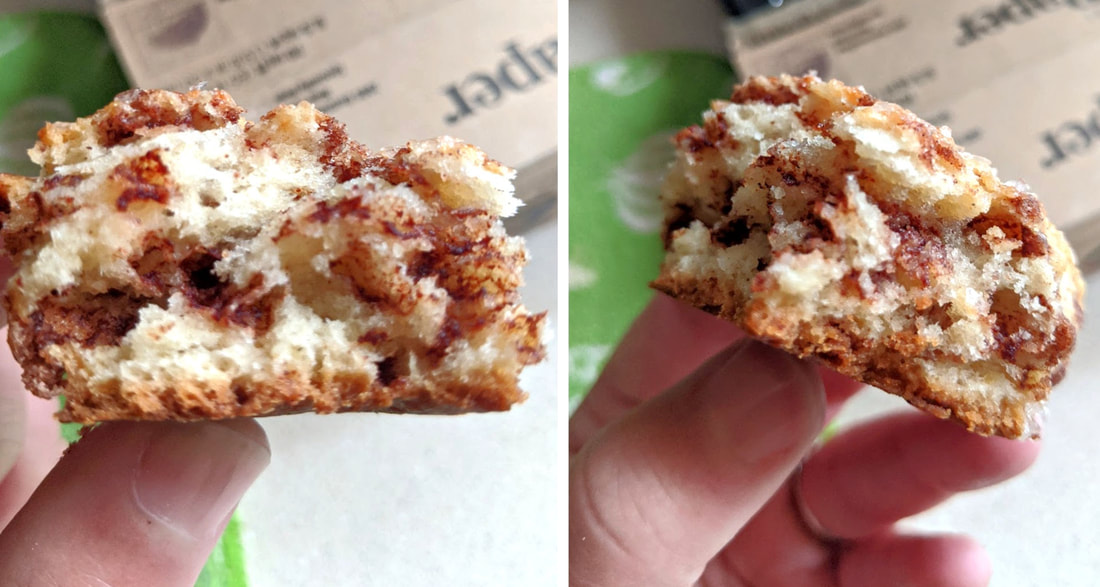 The second recipe was for Easy Holiday Eggnog Muffins. Much less fussy than the scones, so I won’t go into detail. Just click on the link for the recipe and enjoy! The one tweak I made was to use LorAnn Butter Rum Oil instead of eggnog flavoring. This, as the recipe states, was indeed an easy recipe and it yielded a good muffin, made even better by the topping. And, to boot, they look pretty darn impressive. No one will be mad at you if you bring these to brunch.
 Both recipes helped me use up that extra eggnog, which made me feel good. I felt even better getting to enjoy two home-baked treats and sharing them with my family. I hope you take the plunge and try either, or both!! And I hope it helps you use up some of YOUR extra eggnog. Enjoy and Happy New Year!
0 Comments
Hello and welcome to my very first blog post on my new website! I am so happy you have decided to stop by! The goal of my blog is to help give insight into my artistic process, highlight my baking and decorating projects, share my successes and, yes, some fails, to help you have success in your own baking and decorating journey or to help you learn from my mistakes. I suppose I should start with a little introduction. I am a predominantly self-taught baker. I’ve had a fascination with baking ever since I was a kid. Unfortunately, there were very few bakers in the family – most preferred cooking, which I also love, but baking is what I’m known for. I loved sweets, as most kids do, and there was something compelling about being able to create the goodies I loved, from scratch. It was downright magical and gratifying to watch the mixture of those ingredients transform into what they were supposed to be! I was hooked as a child. That said, I was pretty much on my own when it came to figuring out the ins and outs of baking. I would save recipes and look at mouthwatering pictures of ahhmmaaaazing looking desserts and would simply dive in and give them a try, following the recipes religiously. Note, also, that this was as close to science as this liberal arts girl was ever going to get ☺ In my 30’s, I took some basic baking classes at a local community college with the desire to learn techniques in a classroom setting. Following recipes at home is great, but nothing beats having access to a live instructor to guide and correct you, as you go along. I took workshops for bread making, tempering chocolate, baking perfect pastries and quick breads, and finally, FINALLY, a series around making cakes, fillings and frostings from scratch, along with a very basic introduction into piping buttercream decorations. Boy, was I hooked after that! Not only could I make things taste good, BUT I could also make them LOOK incredible and beautiful! I inquired where I could get more hands-on experience and the instructor suggested a 6 week Wilton course at the local Michaels. In 2002, I quit smoking for the 2nd time in my life. I needed to keep my hands and mind occupied, so I went ahead and signed up for the intro course to the Wilton method of cake decorating and never turned back. I would purchase the annual Wilton project books and recreate fun novelty cakes for family and friends. This period always reminded me of the line in the song Closing Time – “every new beginning comes from some other beginning’s end”. The end of my days as a smoker was the beginning of my foray into the art of cake decorating. While the 2nd attempt to quit smoking did not last (I did successfully quit in 2010 and have been smoke-free ever since!), the love of cake design and decorating only got stronger. As the years went on, the internet started providing access to online tutorials and the Food Network amped up entertaining shows such as Cake Wars (Halloween Wars being my favorite!) and Baking Championships. That is when my interest in decorating over-the-top cakes skyrocketed and my skill level multiplied exponentially. I have learned from so many talented instructors such as Shawna McGreevy, Avalon Yarnes, Liz Marek, Suzanne Esper and Sidney Galpern, to name but a few, who have been particularly instrumental in helping me learn and apply new and trend setting techniques to add to my decorating arsenal. I welcome you to join me on my journey of exploration, discovery and creation in the wonderful world of baking. I look forward to sharing recipes, ideas, tips and techniques, pictures and videos. Thank you for your support and please feel free to ask questions or share any feedback along the way! WELCOME!!! |
ArchivesCategories |
 RSS Feed